

Its Friday y'all! I think this calls for an easy DIY!
Seriously...
You can't get much easier than this!
I love mason jars... and chalkpaint... and DIY's! So, lets put 'em all together!
You can decorate with them just as they are or tie some jute around them to add a little pizazz. You can even put some flowers or stems in them!
Here is what you need...

Mason jar
Chalkpaint- you can make your own, like I did! 2 parts paint, 1 part plaster of paris paste (mix a little water into your plaster of paris to create a pasty consistency) Mix it together and voila! You have chalkpaint!
Paintbrush
Newspaper, wax paper, etc. to protect your work surface

I decided to paint my jar that had become kind of foggy.
Paint the jar, with vertical brush strokes, covering the entire outside of the jar. The rim can be painted with horizontal brush strokes for good coverage.
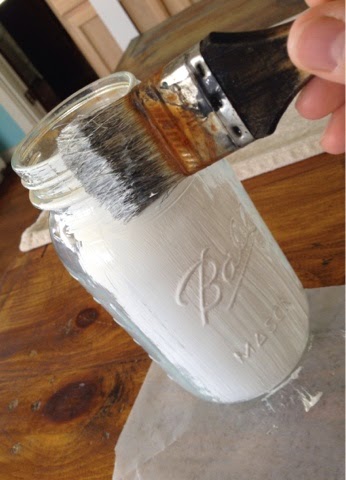

Let it dry completely, then paint a second coat.

I don't paint the insides, but it looks better if you just paint the inside of the rim. Let it dry.

Now, be ready for some really fancy craft work... use your fingernail to lightly scratch some of the paint off of the raised designs. Of course you can use a butter knife or something else if you would rather not use your nails.

Once you finish scratching the designs, scrape off a little from the rim.


If you use a color other than white, you can dry brush a little white paint onto the jar to make it look distressed.

Just a little here and there.


Try more colors, different brands of jars... get creative!
Enjoy your weekend!
XOXO,
Ashley
No comments:
Post a Comment