So I am sure I'm not the only one who drools over the awesome chevron wooden floors I see on Pinterest. I never dreamed I could possible afford anything close to that for my own home. Until I saw a pin about how to create a faux wood backsplash using adhesive vinyl "wood" tiles. You can find the tutorial here: http://pinterest.com/pin/230668812139222375/
My wheels began turning and I wondered if I could do that on a chevron pattern... On the Floor!? The lady who put the backsplash up, did it all by herself! With no help from the hubby! If she could do that, surely I could give it a try!
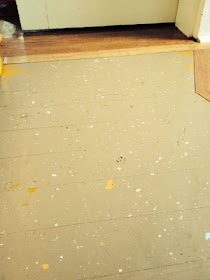
Here is my ugly painted wooden entry floor before I began. Chipping paint and all! :(
So, I started searching online for the best price for a wood finish adhesive tile. Then I found these 12x12 square tiles for only $10 per box of 10!! Seriously?!? Unfortunately, last time I checked Amazon had double the price.
So I started by ordering one box and cutting the "planks" off one by one. I didn't have any fancy method of making a chevron pattern. I just used good ole trial and error.
As you can see, I tried using a vinyl tile cutter... When my husband brought it in for me to use, it sounded like a dream! But I decided it was more trouble than it was worth to have to go back and trim the crooked edges where I didn't line the blade up perfectly. I have a pretty steady hand so I was fine with using a pair of scizzors. The only thing is the blades get gummy with adhesive from the tiles. I suggest keeping an old rag and a can of WD40 handy to clean the scizzor blades. That worked perfectly for me!
Once you get the angle that makes a good chevron, use that piece as a template throughout the process. You will flip the template over to cut every other plank. The peices will fit together to make a lovely chevron pattern :)
The next thing I did was decide which pattern I wanted to make with the different shades of "wood".
Option 1
Option 2
Option 3
I decided on option 3! Looks awesome, right!?
I just started in front of the door in the center of the floor so I could make sure my pattern was where I wanted it to be. Once I got the first few rows placed, I went back and peeled off the paper backing and started sticking it down to the floor.
Instead of cutting little pieces to go to the wall, I decided to create a border. It was much quicker and pretty simple.
🎶Just keep sticking... Just keep sticking... 🎶
See how pretty?? Ahh... I'm in love!
I see a chalkpaint post in my near future, so come back soon!
xoxo
Ashley


No comments:
Post a Comment